> For the complete documentation index, see [llms.txt](https://docs.scepman.com/llms.txt). Markdown versions of documentation pages are available by appending `.md` to page URLs; this page is available as [Markdown](https://docs.scepman.com/es/gestion-de-certificados/certificate-master/user-certificate.md).
# Certificado de usuario
{% hint style="warning" %}
Solo SCEPman Enterprise Edition
{% endhint %}
{% hint style="info" %}
Esta función requiere la versión 2.4 o superior
{% endhint %}
Puede generar manualmente certificados de usuario X.509, incluida una clave privada, a través de la interfaz web de SCEPman Certificate Master. Esos certificados pueden usarse en diversos escenarios de autenticación basada en certificados (CBA), para tarjetas inteligentes y firmas de correo electrónico. De forma predeterminada, los certificados generados tendrán el EKU **Autenticación de cliente** y un Nombre alternativo del sujeto (SAN) establecido como una propiedad de tipo UPN cuyo valor coincide con el UPN proporcionado en la interfaz de usuario.
### Emisión de un certificado de usuario
1. Navega a **Nuevo certificado de usuario** en el menú de SCEPman Certificate Master.
2. Introduzca un UPN para el certificado y seleccione los EKU requeridos.
3. Pulse **Enviar** y el navegador descargará automáticamente el certificado con la clave privada en formato PKCS#12/PFX unos segundos después de que se emita el certificado. El archivo PKCS#12 está cifrado con la contraseña que se muestra en la pantalla. Puede importar el PKCS#12 directamente en el sistema donde se necesite utilizando la contraseña.
{% hint style="warning" %}
Tenga en cuenta que, una vez que abandone esta página, la contraseña ya no estará accesible.
{% endhint %}
Certificate Master - Nuevo certificado de usuario
## YubiKey
Realice los siguientes pasos para inscribir un certificado de tarjeta inteligente en su dispositivo YubiKey.
### Lista de verificación: Requisitos previos
* [ ] *Obligatorio* - Acceso a Certificate Master y a un rol adecuado (`Admin.Full` , `Request.All`,`Request.User`)
* [ ] *Obligatorio* - Acceso a un dispositivo YubiKey con una ranura de tarjeta inteligente libre
* [ ] *Obligatorio* - YubiKey Manager está instalado
### Pasos
1. Abra el portal web de Certificate Master y haga clic en el **+** icono
2. Seleccione **Nuevo certificado de usuario**
3. Especifique el **UPN** según sus requisitos
4. Establezca el **Longitud de la clave** para **2048** bits (actualmente, YubiKey no admite claves de 4096 bits).
5. Seleccione **PKCS#12** como **Formato del archivo de descarga**
6. Seleccione **Autenticación de cliente** y **Inicio de sesión con tarjeta inteligente** desde el **Usos de clave extendidos**
1. Antes de hacer clic en **Enviar**, asegúrese de tomar nota temporal de la **Contraseña** ya que será necesaria al importar el certificado a YubiKey.
2. Abra YubiKey Manager
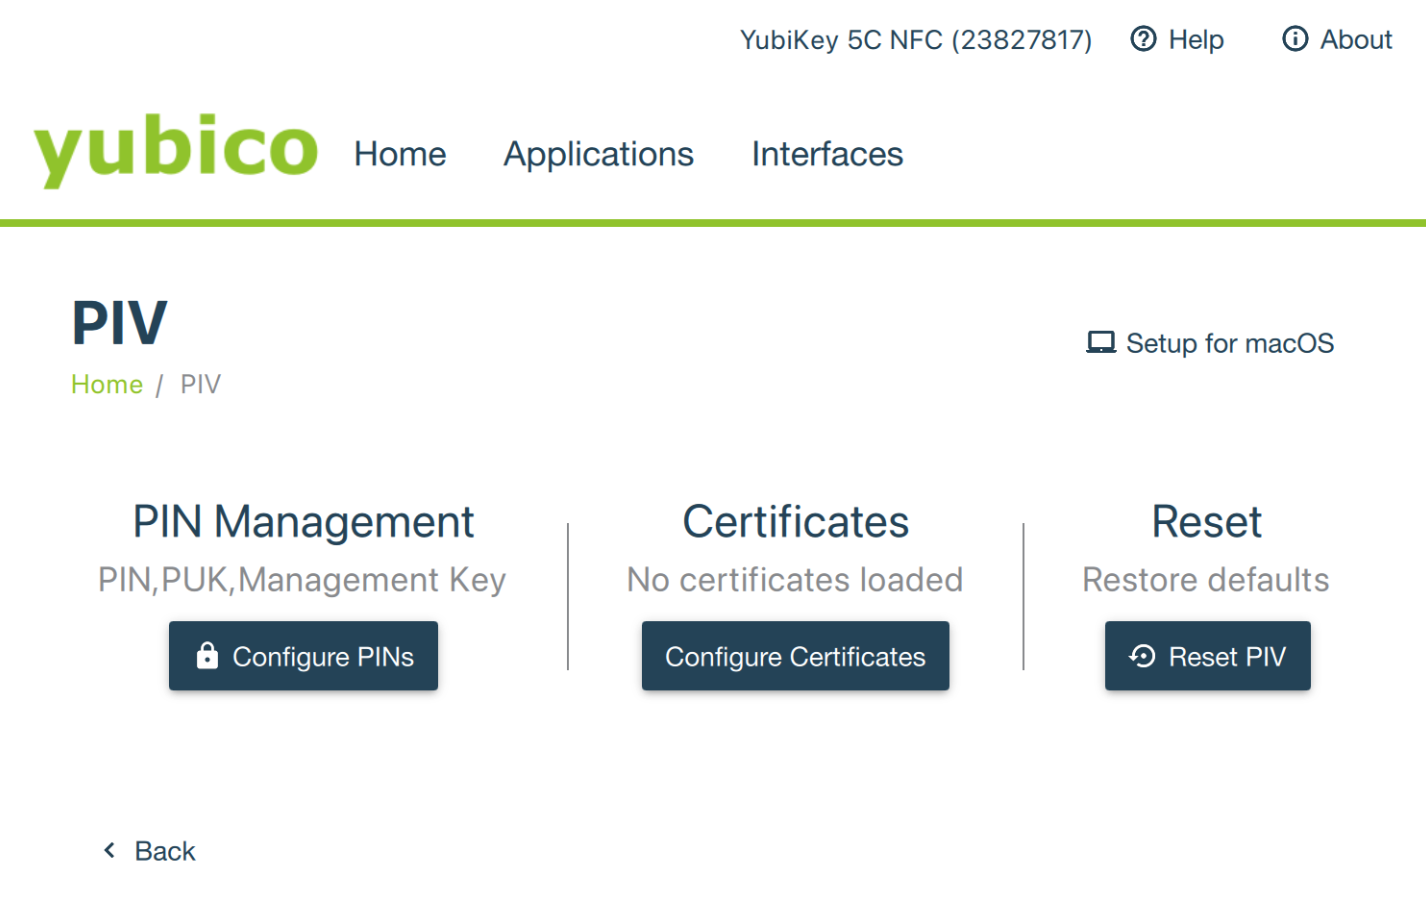
3. Navega a **Aplicaciones** **>** **PIV** y haga clic en **Configurar certificados**
4. Seleccione **Autenticación (Ranura 9a)** y haga clic en **Importar**
5. Cargue el certificado que se generó previamente desde Certificate Master y proporcione la **Contraseña**.
6. Establezca una **Clave de administración** y haga clic en **OK**
---
# Agent Instructions
This documentation is published with GitBook. GitBook is the documentation platform designed so that both humans and AI agents can read, navigate, and reason over technical content effectively. Learn more at gitbook.com.
## Querying This Documentation
If you need additional information that is not directly available in this page, you can query the documentation dynamically by asking a question.
Perform an HTTP GET request on the current page URL with the `ask` query parameter, and the optional `goal` query parameter:
```
GET https://docs.scepman.com/es/gestion-de-certificados/certificate-master/user-certificate.md?ask=&goal=
```
`ask` is the immediate question: it should be specific, self-contained, and written in natural language.
`goal` is optional and describes the broader end goal you are ultimately trying to accomplish on behalf of the user. GitBook uses it to tailor the answer towards what is most useful for that goal.
The response will contain a direct answer to the question and relevant excerpts and sources from the documentation.
Use this mechanism when the answer is not explicitly present in the current page, you need clarification or additional context, or you want to retrieve related documentation sections.